Aubergine á la Avignon

IMG_2154

Food is such a big part of our lives.  Just about everything has a food angle to it!

“It’s our anniversary, where are we going to go for supper?”  “Saturday looks like it is going to be a great day for the beach – shall we pack a nice picnic basket?”  “The in-laws are coming over for Sunday lunch – what new dessert recipe can we try?”  “Let’s watch some videos of our trip to France; then we make some Frenchy foods.”

Benjamin Franklin said “Eat to live, don’t live to eat.”  Well, thank goodness then that I need to eat to live, because I really like living, which means I can really like eating!

We have never returned from our travels with bad food memories (apart from one really bad pizza we had in Rome; think the restaurant was too close to a drain because the smells were awful!).  There are always things that we’ve tasted on our journeys that we try and replicate at home.  A recent favourite is from our trip to Provence a few months ago.

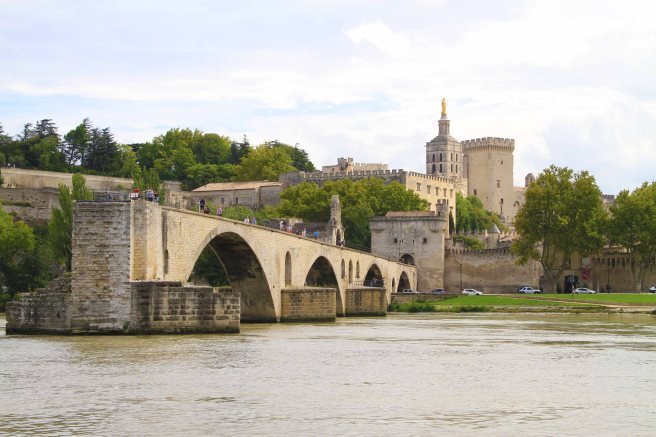
Avignon was our base.  On the must-do list was a picnic on the Ile de Barthalese with its iconic view over Pont Saint-Bénézet and the Palais des Papes.  We decided to stop over at Les Halles to pick up some substance for our al fresco lunch.  Walking around, the “Aubergines á l’ Italionne” caught my eye.  (I love aubergine – a love that only developed a few years ago.  I blame it on all the badly cooked aubergines I’ve had in my life up until that point!)  It looked so good and smelt divine and when one of the local residents standing in line in front of us chose this for her lunch, the deal was done.  What more do you need than the local stamp of approval?!

IMG_2225
Who would not want to have a picnic if you can have such a view?!

Back at home, in the absence of a recipe, hubby and I only had our taste buds and memory to go on when we tried to recreate the dish.  Here is to encouraging a few more aubergine converts with our version.

Aubergine á la Avignon

(serves 4)

Ingredients:

1 large aubergine

4 tablespoons butter

4 tablespoons olive oil

1 large onion, chopped finely

1 teaspoon garlic, chopped finely

400g beef mince

1 tin chopped tomatoes

1 ½ teaspoons tomato puree

2 cups water

1 ½  teaspoons of sugar

1 teaspoon of dried Provençal herbs (oregano, thyme, rosemary and basil)

Salt & Pepper to taste

125g mozzarella cheese, grated

Method:

  1. Cut the aubergine lengthways in 1cm thick slices. Keep the skin on.  You need four slices.
  2. Remove the skin of the remainder of the aubergine. Chop into small cubes.
  3. Heat two tablespoons of butter and a tablespoon of olive oil in a pan. Fry two slices of aubergine until soft, turning regularly to ensure a nice brown colour on both sides.
  4. Transfer the aubergines to a baking tray.
  5. Repeat steps 3 and 4 with the remaining two slices of aubergine. (Aubergines love butter so it is better to do them two at a time to ensure each gets enough to keep them soft and get that nice and golden colour.)
  6. Heat a table spoon of olive oil in a pan. Add the chopped aubergine, onions and garlic.
  7. Fry until golden brown and soft.
  8. Remove the aubergine, onion and garlic from the pan and set aside.
  9. Heat a tablespoon of olive oil in the pan and add the mince. Fry until brown.  This really adds to the flavour.
  10. Once the mince is brown, add the chopped aubergine, onions and garlic back in.
  11. Add the chopped tomatoes, tomato puree, two cups of water, sugar, herbs and salt and pepper.
  12. At this stage, pre-heat the oven (on the grill setting) to 180°C
  13. Let the mince mixture boil until the sauce is reduced completely.
  14. Once done, place some mince on top of each aubergine.
  15. Top it off with grated mozzarella.
  16. Bake in the oven for 10 minutes, until the cheese has melted.
  17. Serve with a salad.

IMG_3274

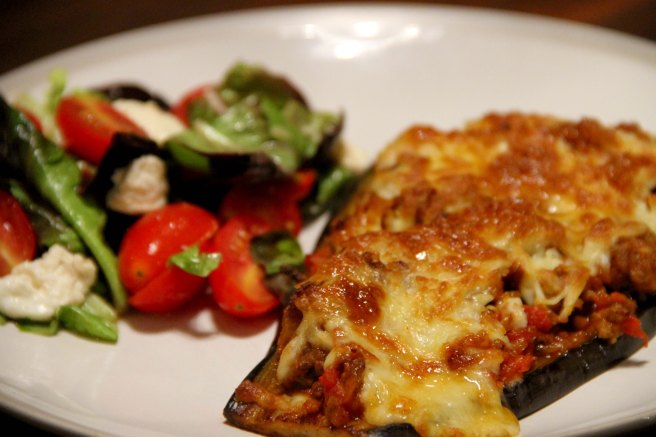
Voilà! Aubergine á la Avignon


Cabbage, Orange and Apple salad

IMG_3207

Having grown up in a home where red meat was the order of the day most days, and veg were limited to potatoes, cauliflower and broccoli, it is no wonder that I am not a big fan of salads.  Either that, or I am just bored with every day go-to Greek salad.  Or could it be because I associated salad with dieting…?!  Let’s not digress.

Currently we are experiencing a heatwave in the Western Cape of South Africa, and these days I find myself on a constant lookout for new and fresh recipes, because let’s face it… on a hot day lounging next to the pool you really just want something that is cool, light and full of flavour.  And because it is not considered proper (by who, I don’t know!) to just have wine for lunch, it means I have to rack my brain to come up with a few different options for a light summer bite.

So at a recent book sale I came across a cookbook published by GQ magazine, entitled “GQ Eats:  The cookbook for men of seriously good taste”.  I had to get it.  Perfect gift for hubby!  (He picked me of course, so his taste is seriously good!)  Also, it doubled as a gift for me too.  The book is filled with quite a few recipes that I would not mind hubby to make for me!

One of the recipes that caught my eye while I was still in the store was a cabbage, orange and apple salad.  Not something I have heard of before, but I could imagine the flavours working together so I could not wait to give it a try.  So last Sunday it was on the menu.  Together with that chilled Sauvignon Blanc, of course!

It is a delicious salad, packed with flavours and textures.  We changed it slightly as the original ingredients in the dressing was not something I could find in any of our local stores.  However, I was really pleased with the outcome.  So much so that it is on the menu again this weekend where I will introduce it to my meat and potato loving family!  Fingers crossed!

Cabbage, Orange and Apple salad

(serves 4)

Ingredients:

For the salad:

150g red cabbage, thinly sliced

2 oranges, peeled and segmented

2 apples, cut into small chunks (not necessary to peel)

20g sultana raisins

15g dried cranberries

70g mixed nuts & seeds (walnuts, almonds & sunflower seeds)

Salt & Pepper for seasoning

Chives to sprinkle over

For the dressing:

50ml orange juice

1 tablespoon olive oil

2 tablespoon apple cider vinegar

1 teaspoon of sugar

Salt & Pepper for seasoning

Method:

  1. Mix the cabbage, orange, apple, raisins, cranberries, nuts and seeds.  Season with salt and black pepper.
  2. Mix the ingredients for the dressing well.
  3. Pour over salad and mix well. Get in there with your hands to ensure all the cabbage is nicely dressed.
  4. Leave in the fridge for at least an hour before serving to ensure flavours develop.
  5. When serving, chop a few chives and sprinkle over the top.

IMG_3206

Travel, laugh, encourage, eat

IMG_9173
The iconic Eiffel Tower in Paris

I hope you like travelling, because then you will know why I have fallen in love with it.  And I could tell you about all our favourite places Hubby and I have discovered. 

We haven’t travelled much internationally.  Wait, that’s not true. We have just not travelled as much as I would like to (i.e. permanently!)  That being said, we’ve seen quite a few places that we’ve always dreamt about, like Paris.

If you like a little bit of humour, you will enjoy this little story about our first time there.

Hubby and I eventually got tired of the hotel’s continental breakfast (only so many chocolate croissants one can have) that we really needed something familiar for breakfast.  This specific day we were on our way to Les Invalides  and we decided to look for something in the vicinity.  We settled on a small coffee bar.  It was run by an elderly gentleman.  His English wasn’t great but we managed to agree on an order of scrambled eggs on a slice of toast (not on the menu, I have to admit, but he was very willing to make it especially for us).  We were excited!  Soon enough he was back.  “Voilà!” Hubby and I were presented with a gigantic sized omelette, filled with what seemed to be a solid block of cheddar cheese… each!  What could we do?  “Merci-beaucoup!”

IMG_3538
Les Invalides, Paris, where Napoleon’s tomb lies under the golden dome

If you appreciate a little encouragement every now and then, I can tell you that anything is possible if you put your mind to it.  I’m a bit of a quote person and a favourite is one from Walt Disney.  He said “All our dreams can come true, if we have the courage to pursue them.”  I certainly don’t have the answers but I will gladly share whatever it is that I have figured out for myself along the way.

IMG_3199
Made it all the way to the Arc de Triomphe

And if you enjoy food, I could tell you about wonderful places we’ve discovered, or I could offer you a recipe now and then.  (I’m by no means an accomplished cook, but I enjoy it enough to try it often!  Or is it that I enjoy eating so much…?!)

One of my favourite chef’s is Rick Stein and in his book “Rick Stein’s French Odyssey” he has this recipe for small, shell-shaped French sponge cakes, called madeleines.  I’ve served as a light dessert many times.  It even has mother-in-law’s stamp of approval and that says a lot, because she really is a great cook.  It is very easy and quick to make.

Madeleines

(makes 24)

Ingredients:

  • 3 medium eggs
  • 100g caster sugar
  • Zest of one lemon
  • 100g plain flour, sifted (and a little bit extra for dusting)
  • 1 tsp baking powder
  • 100g butter, melted (and some more for greasing the moulds)
  • 1 tbsp clear honey

NB:  You do need a madeleine baking tray to give them their unique shell shape.  I actually found a silicone version and it works perfectly.

Method:

  1. Brush your madeleine moulds with the melted butter and leave for a few minutes until the butter has slightly set. Dust with flour, and tap out any excess flour. This will ensure that only a small amount of flour sticks to the butter, which helps the madeleines turn out the mould easier and it also gives them a nice golden finish.  (I do this even though I use a silicone mould.)
  2. Preheat your oven to 190°C
  3. Put the eggs and sugar into a bowl and whisk until the batter becomes thick and mousse-like (about 3 minutes with an electric whisk). Whisk in the lemon zest.
  4. Sift the plain flour and baking powder together and gently fold in, followed by the melted butter and honey. Place the batter in the fridge and leave for 15 minutes to thicken slightly.
  5. Fill each of the madeleine moulds three-quarters full with the mixture and bake for 10 minutes until puffed up and golden. Leave to cool and then remove gently from the moulds.

In this recipe, Rick Stein serves it with vanilla ice cream and vanilla poached apricots.  However, in all the time I’ve been making this I have never been able to find fresh apricots, so I always opt for tinned apricots.  Works just as well in my opinion.

When plating, put two madeleines to one side of each of a shallow dessert bowl. Spoon some of the apricots and a little syrup alongside and add a scoop or two of ice cream.

IMG_1363
My madeleines, with Rick Stein’s French Odyssey in the background

Lastly, I hope that you will find enjoyment in travelling, laughing, finding a bit of encouragement and eating with me!

PS:  And I hope you like photography!

Love to hate

Between hubby and me we have this running joke about me hating slush puppies. It started on our honeymoon, when he bought a slush puppy to drink and I said “ugh, I don’t drink slush puppies – I hate that stuff”. As it turned out I practically finished the whole thing without offering him a single sip. To this day, I still hate slush puppies. So much so, that when we go to the movies, it is all that I ever order to drink!

This weekend I realised that I had one other such hate (although I have not confessed it to anyone yet). I hate corn. Whenever someone mentions that they enjoy it, I’ll typically respond with a “I don’t really like it”. Yet, every time someone makes corn, it inexplicably finds its way to my plate, especially when it is made on the braai. Or lovely little savoury corn cakes. I hate those too. And the sweetcorn cakes at my favourite Thai restaurant, with a sweet plum dip. I always happen to order some.

This past weekend my love/hate affair was taken to the next level. It is summer and I’m so tired of the same old, same old salads. So given the history of my relationship with corn, it naturally makes a lot of sense that it would be corn that would put me out of my bored misery!

Hubby and I adapted this really simple recipe from Jamey Oliver. It has fresh flavours and vibrant colours and it is a great alternative to the normal bowl of leaves. We served it with spicy chicken, but I think lamb chops with a Moroccan spice will go great with it as well. Our guests really enjoyed it. Me? I don’t like corn at all!

Corn Salad 

(serves 4)

Ingredients:

  • 3 corn on the cob
  • 3 spring onions
  • 15 rosa tomatoes
  • Large handful of coriander
  • Juice of half a lemon
  • Pinch of salt
  • Olive oil

Method:

  1. Light your fire or turn on your griddle pan to warm up
  2. Put your corn in a large pot and just cover the corn with water. Boil for 30 minutes
  3. Drain the water. Drizzle some olive oil over the corn and sprinkle with salt
  4. Place the corn on the braai/griddle pan to char slightly. Turn it regularly to ensure an even char.
  5. Remove from the braai/griddle pan and leave to cool
  6. Chop the spring onions, tomatoes and coriander and place in a bowl
  7. Take the corn and slice off the kernels (holding the corn upright and cutting top to bottom)
  8. Add the corn to the chopped spring onions, tomatoes and coriander
  9. Add a good pinch of salt
  10. Add the juice of half a lemon
  11. Mix well and serve
Corn Salad
Corn Salad